27 November, 2006

Glass shot


This one was fun! It isn't hard to make this stuff look really good! (It might be hard to make it look wonderfull, but thats another story!) so, there is 2 ways to shoot clear glass. on a black background, or on a white back ground, and with a white, or black out line (opposite to what the background is) there is ways of adding colour, but it's still the same setup. for the white outline, you just light the glass from behind, with the black back ground. However for the black outline (Like this one) you light the white background, and block as many reflections in the glass as you can.

Printer profiling


Well, this one isnt terribly interesting, but it is something we have to do for Printing class. So this is a file you can download from any colour management company, and it has no "colour space" attached to it ( the computer doesnt adjust things) all the colours are known to be certain values. so I then print this out on a printer. Then I take the print and put it through a spectral analizer, which measures the colour values of each square. then the computer program that runs the analizer builds a file that adjusts the settings in the computer to make the printed colours fit what they are supposed to look like. it's a bit of a process, but when I'm done I should be able to just hit print and have very little colour correcting to do to make my prints look right.

The Storyboard


Well, sorry it's taken so long to get this up, but things are just coming due this week and next week etc. so hopefully as I complete some stuff, I'll get it up here.
So this one was the second large format layout we had to do. except this time it was as a story board (we were to pretend we were presenting our photos to the editor of a magazine) So as a story board, it wasn't so much the layout that was important, as presenting the images in such a way as to sell them. I think it turned out ok. I had to go into an area of town, and talk with people to get them to pose for me, and to gain access to certain areas that I might not normally go.

19 November, 2006

many projects

Allright, allright, so it has been a while.. well... I guess I've just been busy! :) they finally loaded us up with projects again, and I'm now hip deep in getting them done. so this post is a whole collection of all the stuff I've finished so far that has either been handed in, or will be handed in soon.


Well, this one is another complation similer to the bus stop add I did earlier, however there was much harder selections to make. the bird had to be selected and lightened, the grass in front had to be taken from another picture, and the stalk of grass was from another picture again. Thenwe had to lighten the bottom portion. and change the background to some sort of artistic filter...


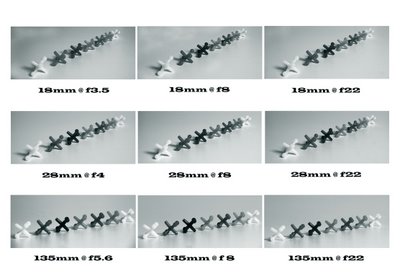
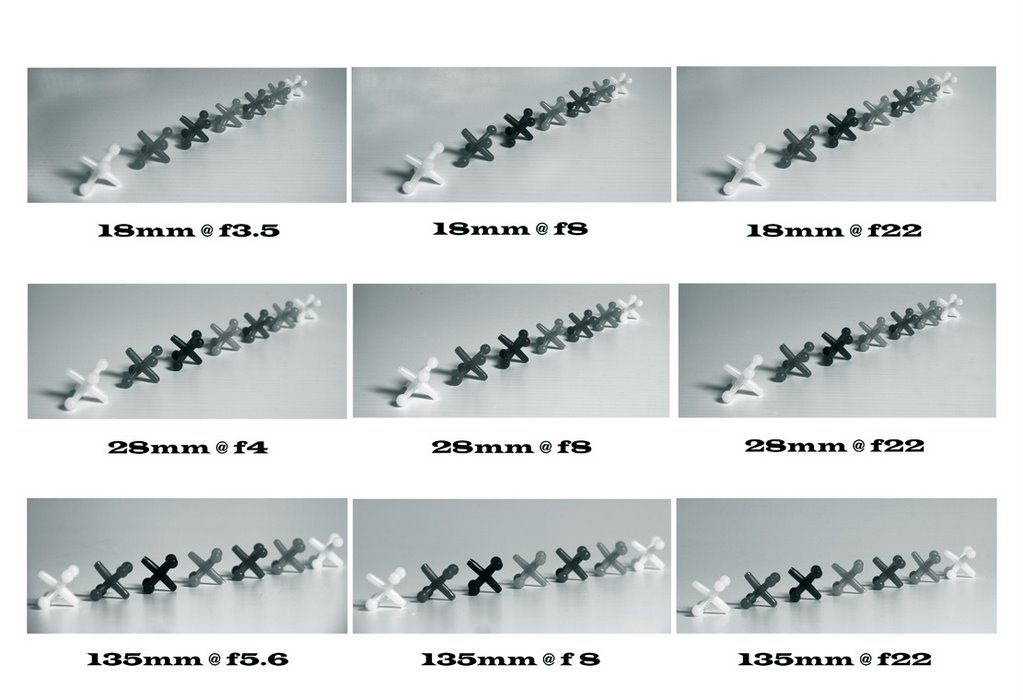
This was a project to show changes in depth of field, (and perspective) when you change the aperture and the focal length. the labels are self explanitory. see if you can tell the difference. (the higher f-stop, creats a larger depth of field, which means you should have more of your subject in focus.)


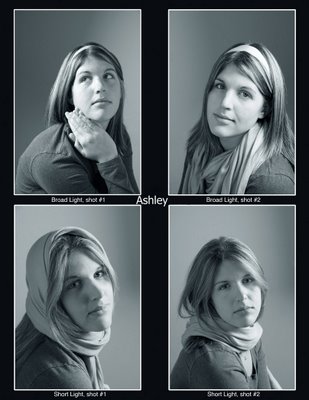
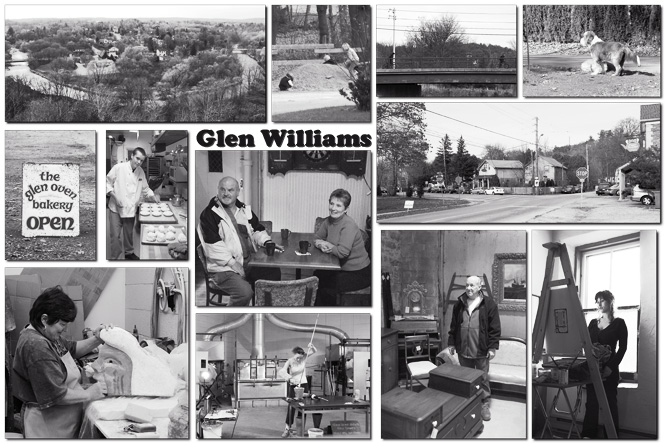
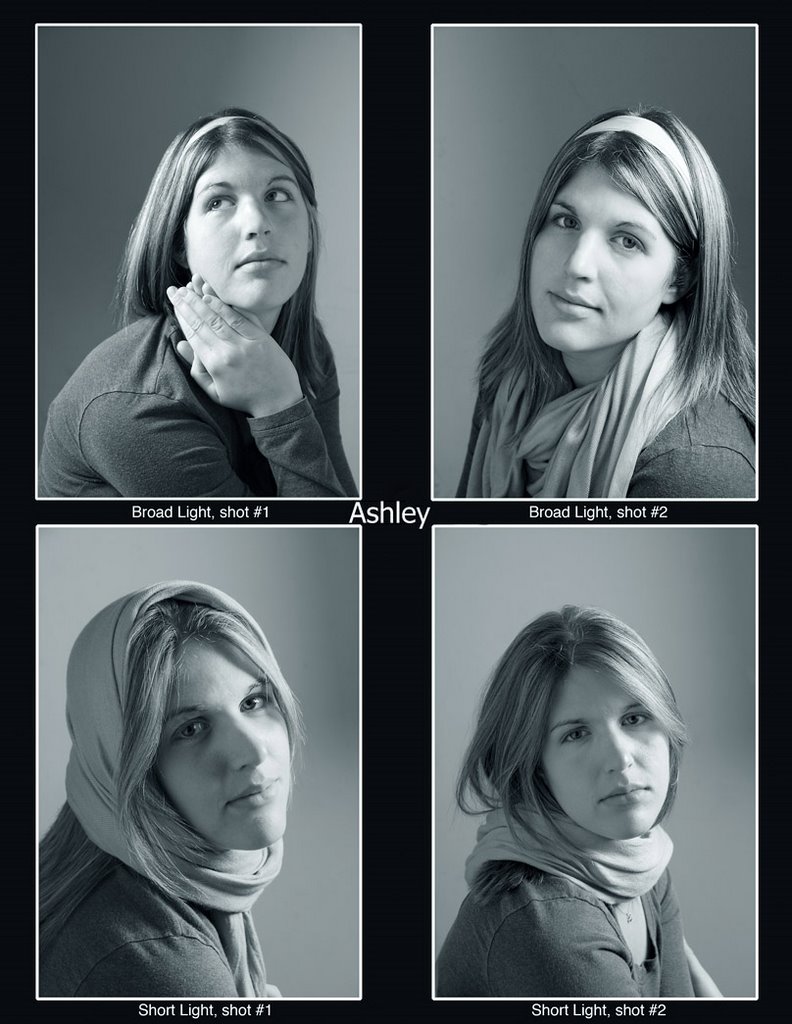
My latest portrait shoot. we had to use split lighting (Or 90^ light) plus we had to pose our subject. and then we had to have 2 shots with the light on the short side (the side of the face away from the camera) and 2 shots on the broad side. Ashley was a great model (I think shes had some experience :P) but I guess we work well together, because she has some great shots of me too..! (christmas, people... christmas ;))

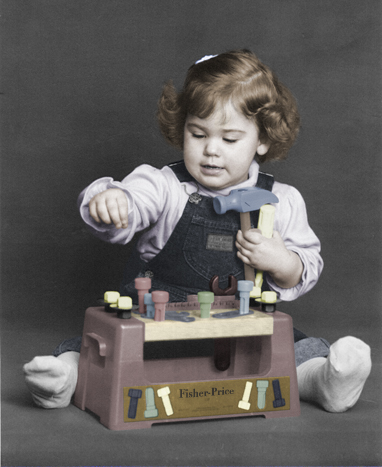
So this was an ongoing project in photoshop class. He showed us various ways to colourize a picture, and using those ways we had to take this picture here, and turn it into this picture here:


And then... For Printing class we had to colourize yet another B&W image, in yet another way... this one was fairly easy but I still have to print and mount this (yes we are starting to mount our images, so they are presentable.

10 November, 2006

"The Cookie"


Mmmmmmm Cookies... well, you cant really eat this one. :) this assignment was to create a cookie. this is something you put in front of your lighting to create an effect using the shadows. so this took me about an hour to make and then another hr to get it all set up, but I kinda liked how it turned out. not perfect, but it'll do! :)
We have been rather slow lately on our projects, although they seem to be getting more indepth. I've got 3 or so on the go right now, so keep hanging on, they'll be good hopefully! :)

02 November, 2006

Mid terms

Ok, just a quick note, I've just recieved my mid term marks. and they range from 72 to 96.. with an average of 82! :) So I'm rather happy with it so far...:)
Back to work now....